

Focus Advanced Publishing Software Tutorial
Setup FAP
FAP is a Client-Server system. The client, which is installed on each PC, connects to the SQL database installed on a central server on the network.
To setup the client
- Download the latest version of the software, click to go to the Focus Download page.
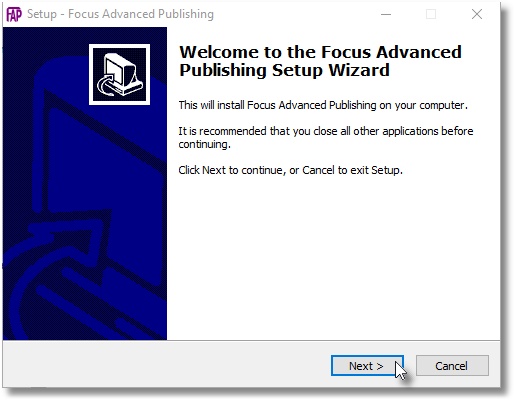
- Run the downloaded installer and follow the instructions.
- Start Focus
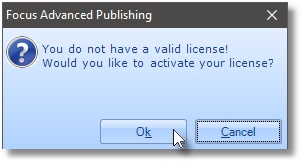
- Activate Licence. For valid licence code file, contact support@focusservices.co.uk
- Connect to your SQL database
- Login
Requirements
Before running the Focus software ensure the following have been setup.
Start Focus
To start Focus, do the following
- Double-click the FAP icon on your desktop.
- Or on the Start menu select All Programs > Focus Advanced Publishing.
- If you are running Focus for the first time, click OK to open the Licence Activator dialogue.
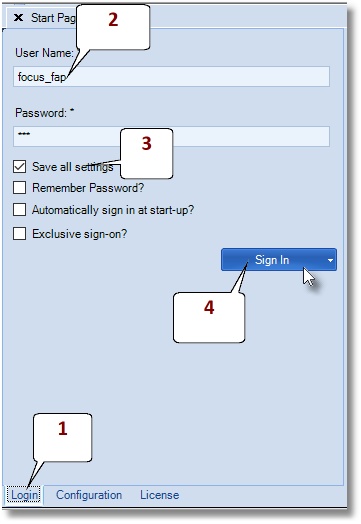
- Enter your user name and password and click the ‘Sign In’ button.
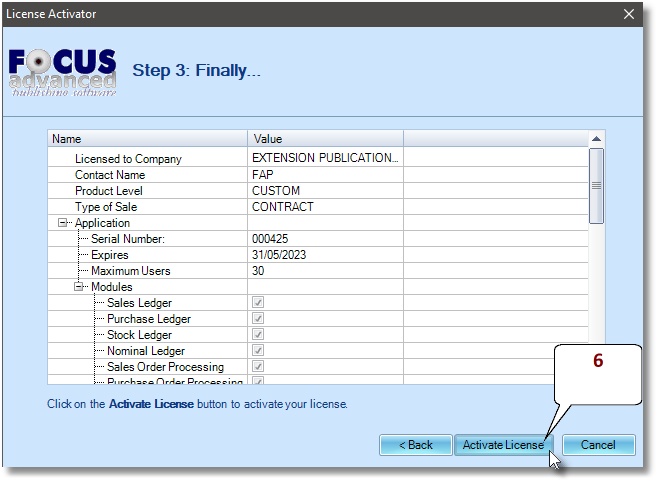
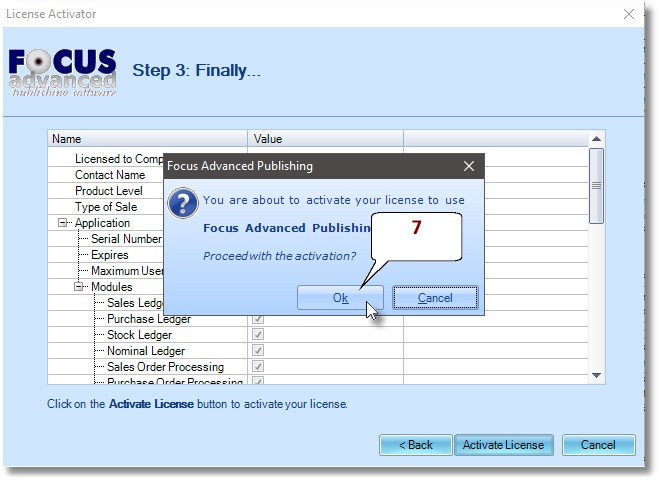
How to Activate Licence
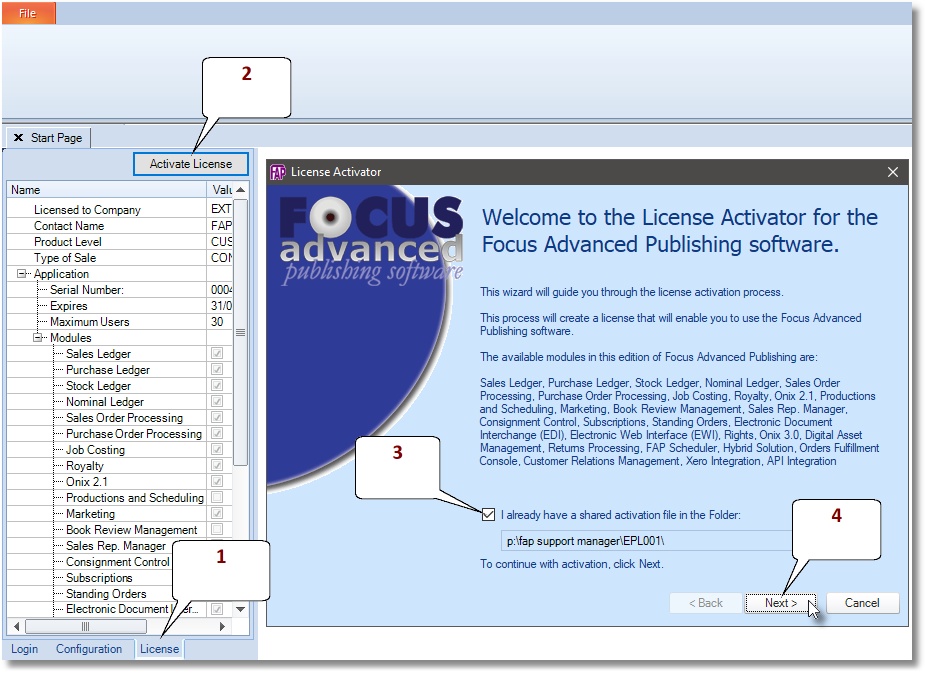
First download and save the activation file to a location on the ‘P:\’ drive. Then
- Go to Start Page > License tab
- Click Activate Licence
- Tick the “I already have a shared activation file in the Folder” box and navigate to the folder containing the activation file.
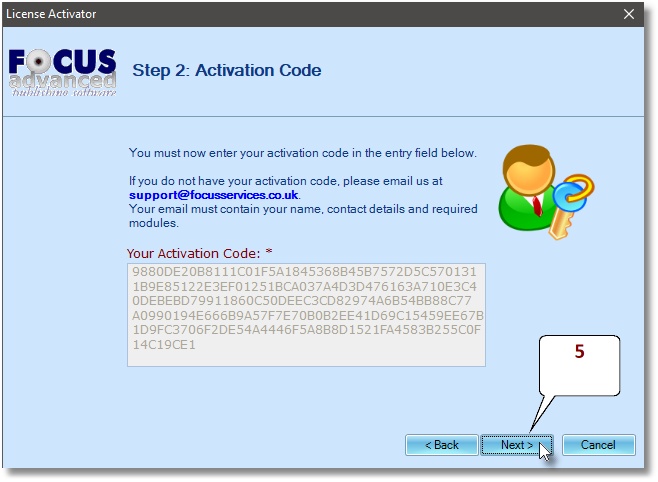
- Click Next to display your activation code
- Click Next
- Click Activate Licence
- Click OK
Connect to your SQL database
- On the Start Page select the Configuration tab
- In the Server Name box enter the server name e.g. ‘focus\SQLExpress’
- In the Database Name box enter ‘FOP_Data’
- In the Authentication box select ‘SQL Server Authentication’
- Enter the database user in the User Name box and the password in the Password box.
- Click the Test Connection button
- If the connection is successful, continue to login by clicking the Login tab.

Install Crystal Report Redistributables
Crystal Report Redistributables enable the system to display the Report Viewer window. Depending on the specifications of your PC, you will need to install a combination of the following For 64-bit machines run the following files in the order suggested- CRRedist2005_X64.msi
- CRRedist2008_X64.msi
- CRRedist2005_X86.msi
- CRRedist2008_X86.msi
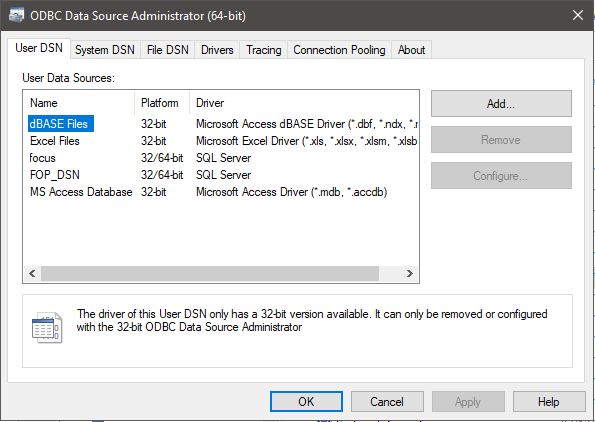
Setup ODBC
To setup Data source name FOP_DSN
- On Windows Start menu select Control Panel > Administrative Tools > ODBC Data Sources (64-bit)
- On the ‘User DSN’ tab click Add.
- Scroll down the list to select SQL Server, and click Finish.
- Type FOP_DSN in the Name box.
- In the Server box enter the location of your SQL Server ‘SERVER\SQL’.
- Click Next.
- vii. Set SQL authentication
- Enter the database Login ID and Password
- Click the Next button.
- Tick the Change the default database to: box and select FOP_Data from the dropdown list.
- Click Next then Finish.
- Click Test Data Source.
- Click OK to finish.
- On the System DSN tab click Add and repeat steps 3 to 13.
Create a New Order
Release an Order
Edit an Active Order
Reverse a Done Order
Batch Release and Reprint
Dues invoicing (Backorders)
SOP Error Log
Returns System
Add New, Edit Title Records
Receive Stock (Goods-In) to a Location
Send Out Consignments or Transfer Stock
Process Sales Orders
Do Stocktake
Process Printer/Supplier Invoice
Calculate unit costs
Post Stock Value to Cost of Sales
Add, Classify Edit Accounts
Post Journals
Cash Book
Transfer Money
Post Budgets
Setup Control Accounts
Cost of Sales Overview
Post costs from Purchases
Post Direct Job Transactions
Calculate unit costs
Job Profile / Enquiry
Calculate Royalty
Print, Email Royalty Statements
Post Royalty Payments
Withholding Tax on Royalty
Add Author Records
Set Royalty Rates
Set Rights Royalty