

Editorial & Production
The Editorial and Production module enables you to manage a Project through a customisable workflow, cost estimating, purchase orders, print instructions, specifications, publication date changes, bibliographic data (for ONIX purposes), images and digital assets.
Tour the Editorial and Production module
The Editorial and Production module is made of 2 segments, namely: Product Management and Reports.
- Product Management: Each project is managed under 8 sections, namely:
- Reports: The Editorial and Production module is shipped with a rich library of reports, which are accessible from the standard Report Section and the custom Report Viewer.
- Standard Report Section: The Reporting section is the quickest route to getting started every day. It is an alternative method to “Find and Edit a Project”
- Custom Report Viewer:
A Project is a family of products, i.e a book title and its product forms. It contains a user-definable and workflow-driven progress tracking from proposal to product; each workflow node is capable of emailing unlimited alerts, mail-merged documents, screen/emailed notifications, auto-assigning of ISBN and auto-creation of product forms (such as eBook, Hardback).
FAP introduces the Concept of Project (Header/family) and Products (children) relationship to address the emergence of e-products and their relative importance against traditional forms such as paperback and hardback, which have meant that modern publishing no longer assume the paperback or hardback to be the primary product forms.
FAP now better reflects this trend in the industry; hence the general processing is now anchored in the concept of the Project. FAP allows you to work at the level of a Project and then create product forms form there on.
Unlike in the FOP where the book starts life as a paperback or hardback, the trend in modern publishing tends to treat these as merely possible product forms with same importance as eBooks and other formats. This means that if the book will be published in more than one product form, e.g. eBook as well as paperback, both product forms are held together under same Project code, and will subsequently share common data such as title, author, subtitle, cover image etc.
The module organises the products under an umbrella project name, this ensures that when updating is done at the project level, the system will copy down the fields where the project and products should share identical values.
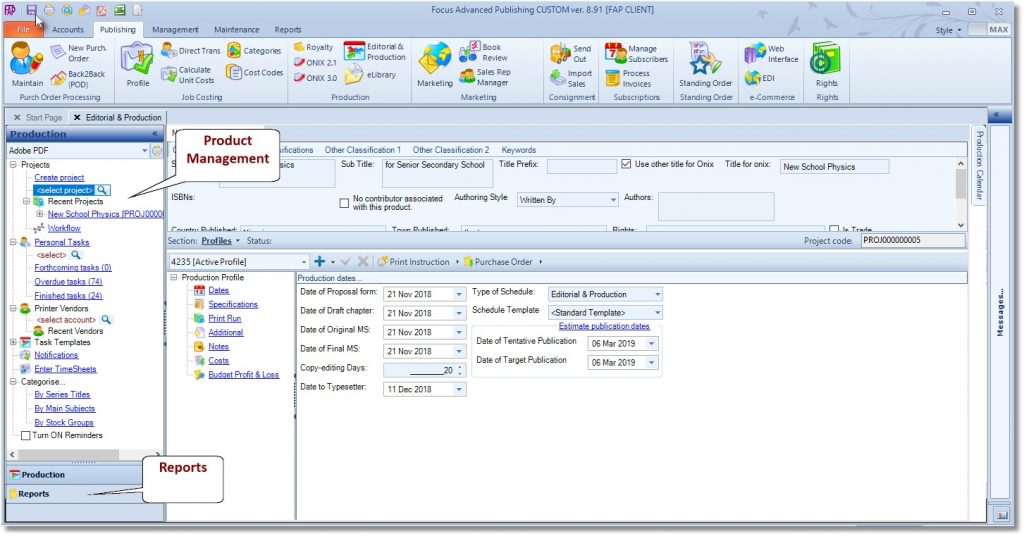
Profiles section
- Dates
- Specifications
- Print Run
- Additional
- Notes
- Costs
- Budgeted Profit & Loss
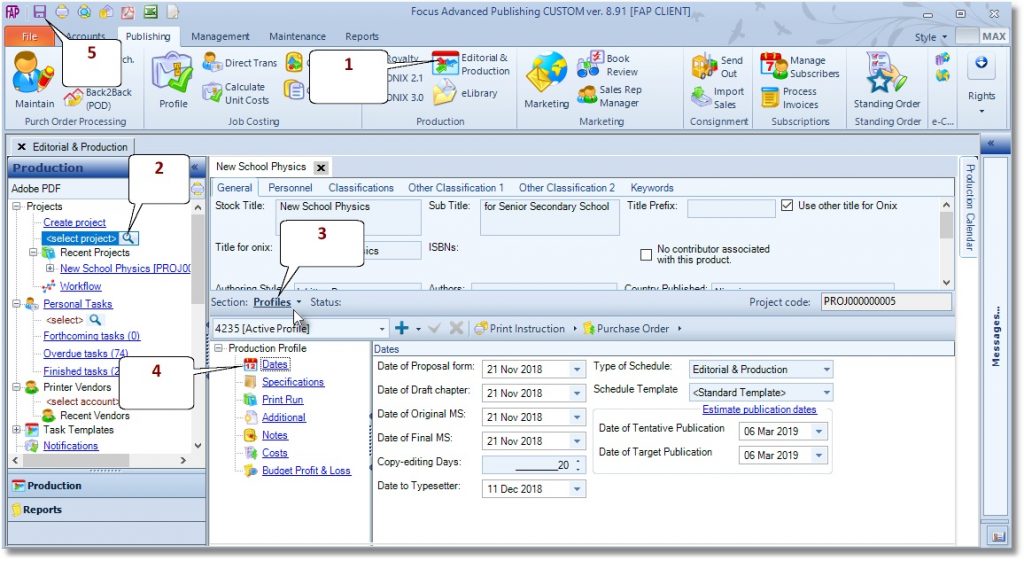
Dates
These are the controlling date settings that govern the project’s life cycle. They can only be set by authorised users.
The Target publication date can now be auto-projected from the selected Type of Schedule, Manuscript Date or Handover Date as the project starting date, plus the total duration from the selected Schedule Template. The Target publication date suggested by the system may be manually overwritten, for example, if a specific day of the week was preferred.
The Type of Schedule is preset, in Preferences, to choose between Revised Manuscript Date and Handover Date, as the preferred starting date in all its uses.
The Schedule Templates contains the individual tasks and their duration that make-up the project-cycle.
The Target publication date also serves as an end date for which all other dates MUST NOT exceed. Any estimated tasks falling outside the Target publication date are shown in bright red. To correct, an authorised user must adjust these dates below or manually change the estimated dates/duration in production scheduling window, until they all fit.
NOTE: Please be aware that when the target publication date is changed, the system will prompt for a reason, and an email will be sent to key personnel, showing the reason and the new date entered.
Specifications
Please enter the specification for the project; these entries will be used to estimate the editorial and printing cost, in the Costs section below.
Print Run (per product type per sales region)
Please enter the projected Print Run per product type (Paperback, hardback, etc.), these will be used in the budgeted profit and loss calculations and in the print instruction.
Additional Specification
Additional spec may be entered here, and the window also provides a summary and a projected 3-year forecast, based on the print run and costing sections.
Notes
Enter messages to share with colleagues here.
Cost (per product type)
The cost section (estimator) can estimate the pre-press and printing related costs to reveal a new product’s profitability. When estimating the printing cost, the cost estimator can compare all the stored vendor scales to reveal the best price for a given specification, but the user is allowed to choose the preferred vendor from the list.
In the product life cycle, the cost estimator has the ability to create several working versions, reflecting the number of times the parameters for the specific title have changed and it also has the potential to freeze the approved version. Only one cost can be active.
Budgeted Profit and Loss
This provides the mechanism for assessing the viability of a proposal in terms of its projected:
- Revenue
- Pre-press and printing related costs
To reveal its:
- Budgeted unit cost
- Gross profit ratio (GP)
- Breakeven point, per title
They can be stored for future reference and for monitoring the actual costs versus the budgeted costs per title. See the Excel view on the next page.
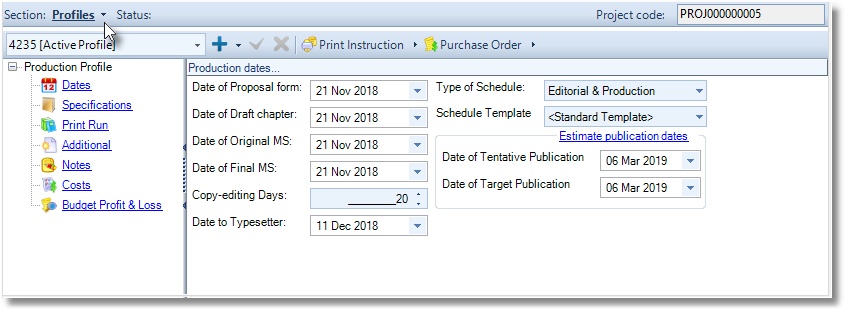
Blurbs Section
The following blurbs may be held in text-only or HTML formatted.
- Author Bio
- Description (Book Blurb)
- Table of Contents
- Reviews
- Short Description (Keynote)
- US Marketing Blurb
- Sales and Marketing Highlights
- Review Quote Previous Edition
- EU Selling Point
- UK Selling Point
- US Selling Point
- Readership
- Author’s previous works
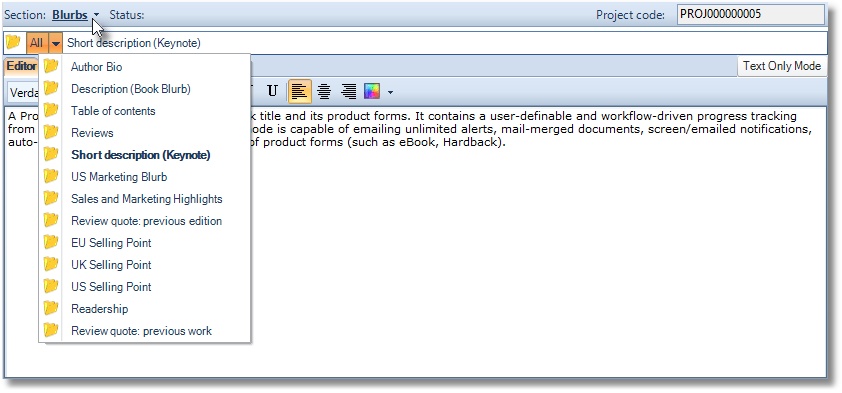
Images section
4 image covers may be held against each project, but image 1 is used in the AI or TI sheet.
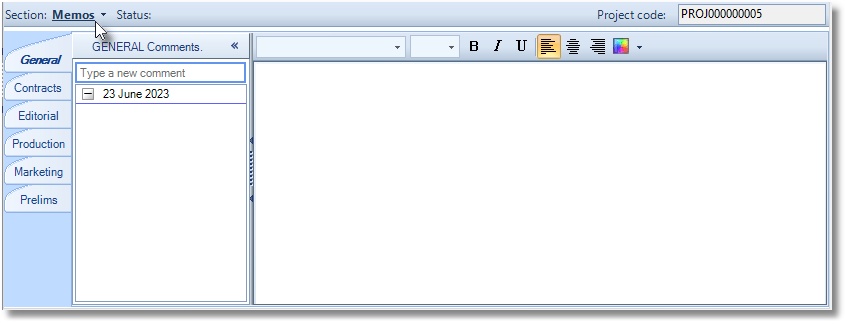
Memos section
Each department (General, Contracts, Editorial, production, Marketing and Prelims) are presented with its memo section.
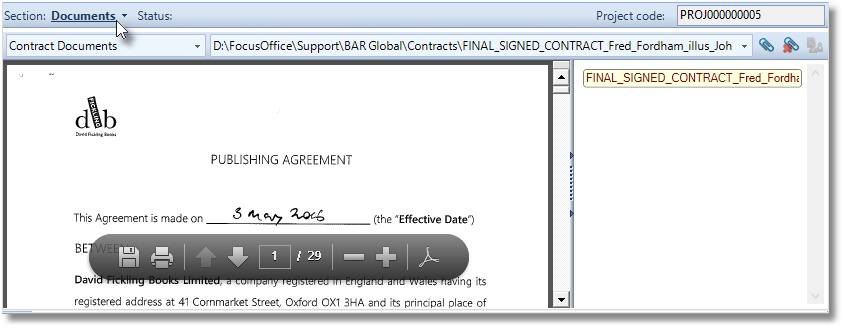
Documents section
Documents may be attached here.
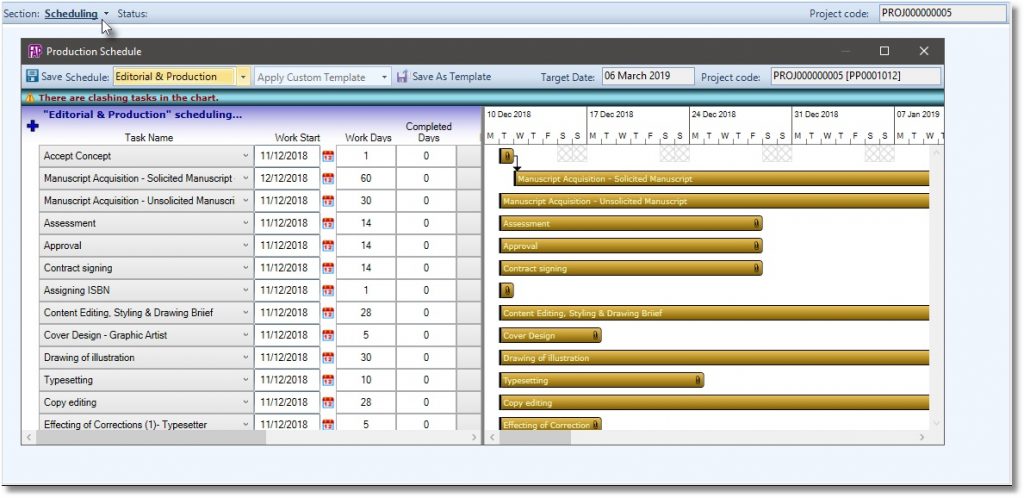
Scheduling section
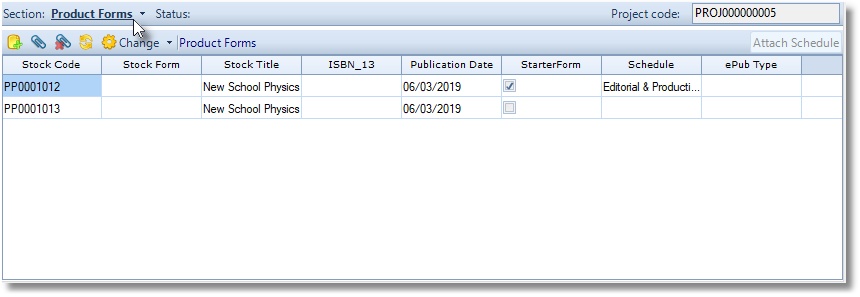
Product Form section
By default the production will create a product type as specified and subsequent product types may be manually created or attached under this window. Double-clicking on each product type will open up its own detailed window, as shown below.
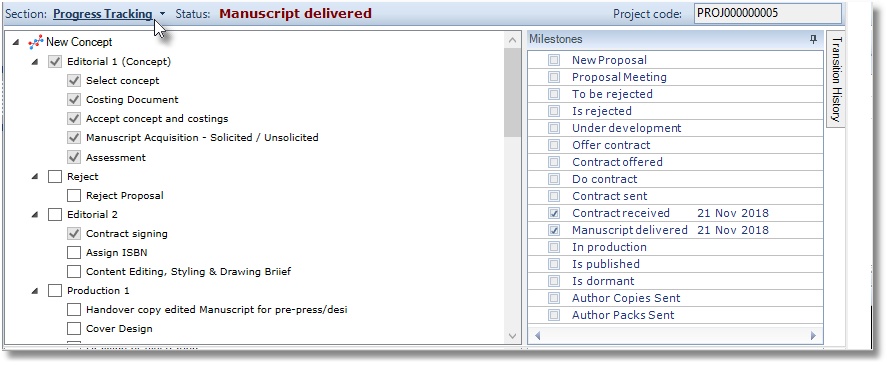
Progress Tracking section
Your dealer should help setup an initial Progress Tracking workflow during the installation exercise, where the tasks will be configured to trigger embedded actions, such as emailing specified personal at the appropriate stage/task.
Steps
The Editorial and Production module enables you to
- Add a new Project
- Find and Edit an existing Project
- Continue editing on the Product Window
- Change Stock Code
- Edit Controlling Date Settings
- Edit Specifications
- Add Print Run
- Add Costs
- Add Selling Price
- Get Budgeted Profit and Loss
- Track Progress
The Editorial and Production module is shipped with a rich library of reports, which are accessible from the standard Report Section and the custom Report Viewer.
Standard Report Section: The Reporting section is the quickest route to getting started every day. It is an alternative method to “Find and Edit a Project”
Custom Report Viewer: Here are the reports which provide an eye into the editorial and production module. They bring together the workings of the module into an easy-to-view layout and are designed to auto-email to key members of staff at a scheduled time and set frequency.
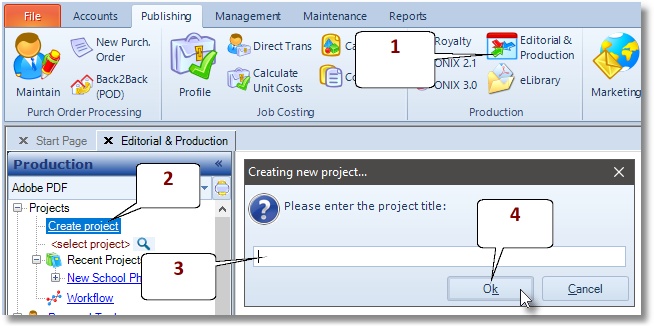
How to Add a new Project
- Go to Publishing > Editorial & Production.
- Click on the Create Project option as indicated.
- Enter the name of the project in the space provided.
- Click OK to finish.
- The system will reject a name that is already saved in the system.
- To successfully create a new project the system must be set to auto-generate new code for stock records.
How to Find and Edit an existing Project
- Go to Publishing > Editorial & Production
- Click on the magnifying glass as indicated, or find and click the required project under the heading Recent Projects, as shown below.
- Enter a search text into the space provided. You do not need to enter a full title into the search, a unique part-title will do.
- Finally, press the ReturnKey on your keyboard or click on the OK button, as indicated below.
How to continue editing on the Product Window
- Go to Publishing > Editorial & Production
- Click on the magnifying glass as indicated
- Enter a search text into the space provided. You do not need to enter a full title into the search, a unique part-title will do.
- Press the ReturnKey on your keyboard or click on the OK button, as indicated above.
- Expand the stock record by clicking the (+) sign beside the name.
- Click Product Forms Section
- Double-click on a product form to go to the Product window.
- To access the Editorial & Production and theProduct windows side-by-side, right-click the Product Window tab and select New Vertical Tab Group
How to Edit Specifications
- Click on the magnifying glass, or find and click the required project under the heading “Recent Projects”, as shown below.
- Next, click on the plus (+) sign to the left of the project name, to open the sub sections for the project.
- Next, click on the “Profile section” option.
- Next, click on Specifications, as shown below.
- Click on Savebutton to finish.
How to Add Print Run
- Click on the magnifying glass, or find and click the required project under the heading “Recent Projects”, as shown below.
- Next, click on the plus (+) sign to the left of the project name, to open the sub sections for the project.
- Next, click on the “Profile section” option.
- Next, click on Print Run, as shown below.
- Click on Savebutton to finish.
How to Add Costs
- Click on the magnifying glass, or find and click the required project under the heading Recent Projects, as shown below.
- Next, click on the plus (+) sign to the left of the project name, to open the sub sections for the project.
- Next, click on the Profile section
- Next, click on Costs, as shown below, to add the costs per cost code and category.
- Click on Savebutton to finish.
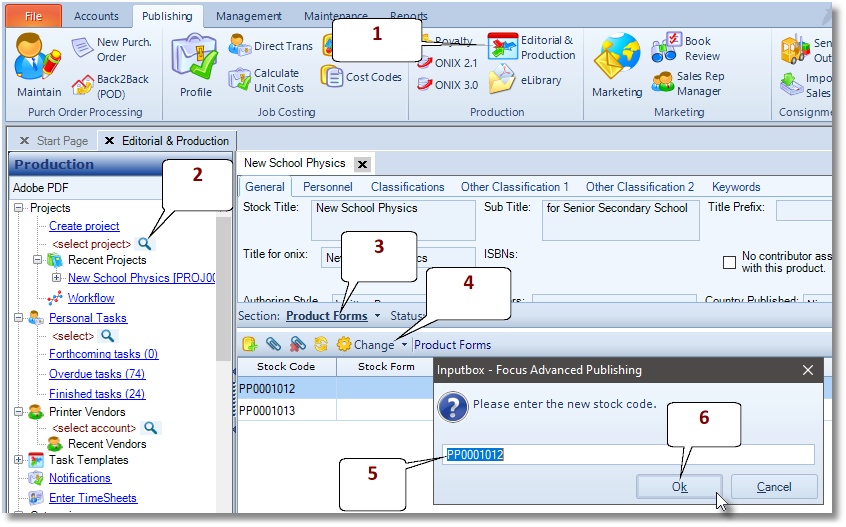
How to Add Selling Price to the Project
Prices are added to the product level.- Click on the magnifying glass, or find and click the required project under the heading “Recent Projects”, as shown below.
- Next, click on the plus (+) sign to the left of the project name, to open the sub sections for the project.
- Next, click on the “Product Form section” option.
- Next, double-click on a Product Form in the list shown on the right, to go to the Product window.
- Next, enter the Selling price into the field called Price 1, as shown below.
- Click on Savebutton to finish.
Get Budgeted Profit and Loss
- Click on the magnifying glass, or find and click the required project under the heading “Recent Projects”, as shown below.
- Next, click on the plus (+) sign to the left of the project name, to open the sub sections for the project.
- Next, click on the “Profile section” option.
- Next, click on Budgeted Profit & Loss, as shown below.
- Click on export to “Excel” button to finish.
How to Track Progress
- Click on the magnifying glass, or find and click the required project under the heading “Recent Projects”, as shown below.
- Next, click on the plus (+) sign to the left of the project name, to open the sub sections for the project.
- Next, click on the “Progress Tracking section” option.
- Tick to complete a task
Editorial and Production Reports
Standard Report Section
The standard reporting section is the quickest route to getting started every day. It is an alternative method to “Find and Edit a Project”- Go to Publishing> Editorial & Production
- Click on the Reports
- Depending on the report required, please click on the applicable Run Reportlocated under its name:
- Double-click on a result line to continue editing.
Custom Report Viewer
Here are the reports which provide an eye into the editorial and production module. They bring together the workings of the module into an easy-to-view layout and are designed to auto-email to key members of staff at a scheduled time and set frequency. The following 5 custom reports are shipped with FAP.- Idea Evaluation Schedule– shows uncommitted proposals
- Idea Rejected Schedule– lists all rejected proposals
- Production Tracking (Post Contract) – shows all proposals under development
- Production Schedule – Showing Forthcoming and Overdue Tasks
- Publication Schedule– broken into Just published/Forthcoming/Recently Updated Titles
How to run a report
- Go to on the Reports > Report Viewer
- Next, click on the plus (+) sign on the left of Editorial and Production Reports
- To run any of the reports, simply double-click on the required report, and then follow the on-screen instructions, if applicable.
How to Print a Report
- Click on the printer button located at the top-left of the FAP Report Viewer window, as shown below.
- Next, follow the printer dialogue.
How to Export the report
- Click on the Export button located at the top-left of the FAP Report Viewer window, as shown below.
- Next, click on the drop-down list opposite the “Save as Type” option, to specify the required output type. The standard options available are: PDF, Excel (Data only), MS Word, and Rich Text).
- Next, navigate to the drive and folder you wish to save the report.
- Next, click the Savebutton to finish.
Idea Evaluation Schedule (Pre-Contract) – explained
This schedule is designed to report all projects awaiting approval/commitment and forms an integral part of weekly production meeting. Once a project is signed off, the project will drop-off this report and migrates to the Production Tracking (Post Contract). If required, we can setup the system to only allow senior management to sign off projects.Idea Rejected Schedule – explained
Reports rejected or dormant projects. This is particularly useful for highlighting repeat proposals from the same author or where a project may suddenly become relevant, after an initial rejection.Production Tracking (Post Contract)
It reports all projects in production, that is, work-in-progress (WIP) titles. Once a project is marked as published, it automatically drops-off this report.Production Schedule – Showing Forthcoming and Overdue Tasks
This is a simple report for outputting forthcoming and overdue tasks per month and across all titles. Settings Before using the Editorial and Production module you have toAuto-generate new code for stock records
- Go to Maintenance> Preferences
- Select Code Formats
- Under Stock Ledgerselect System-Generated
- Click the Savebutton
Configure the Progress Tracking Workflow
Your dealer should help setup an initial Progress Tracking workflow during the installation exercise, where the tasks will be configured to trigger embedded actions, such as emailing specified personal at the appropriate stage/task.- Go to Publishing> Editorial & Production
- Click on Workflowand indicated below, to configure the Progress Tracking Workflow as required
- Click Saveto finish